I’m giving Mastodon a test drive, in case Twitter implodes or otherwise disappears. Find me at: @KirkIsmay@mstdn.ca
Learn Programming with Andy Harris
I like Andy’s videos, as he does a good job of teaching you to think like a programmer. I also like the fact that he uses the either the native Python IDLE environment or pythonanywhere.com, instead of spending a lot of time on setting up a custom development environment. This makes it easier to learn whether you’re running Windows, Mac or Linux on your computer.
Here’s how to learn Python:
- Download Python from: https://www.python.org/downloads/
- Use the Python “IDLE” environment edit and run code. The pythonanywhere.com approach is fine, but does require registration.
- Watch the tutorials:
- How to Think Like a Programmer: https://youtu.be/azcrPFhaY9k
- His CS1 Python course: https://www.youtube.com/playlist?list=PLYwSrMCScKQsWfYV8UvhcFmo_E9zNZwGP&index=12
This starts in the middle of the course, the first half is computer science fundamentals.
- Practice!
Repartition a Debian Digital Ocean Droplet
1. Create a Droplet
For this example, I made a small droplet running Debian 8.1 x64. These instructions may work for older Debian versions, and might work for Ubuntu. You may need to use some other method to boot a live environment than the Grml package I used.
https://www.digitalocean.com/community/tutorials/how-to-create-your-first-digitalocean-droplet-virtual-server
On first boot, you can see that we have a 20GB disk (/dev/vda) as a single Linux partition:
root@debian:~# fdisk -l /dev/vda
 Disk /dev/vda: 20 GiB, 21474836480 bytes, 41943040 sectors
 Units: sectors of 1 * 512 = 512 bytes
 Sector size (logical/physical): 512 bytes / 512 bytes
 I/O size (minimum/optimal): 512 bytes / 512 bytes
 Disklabel type: dos
 Disk identifier: 0x4e0e3620
Device     Boot Start      End  Sectors Size Id Type
/dev/vda1  *     2048 41935724 41933677  20G 83 Linux
2. Install GRML RescueBoot
It’s a two step process, first install the grml-rescueboot debian package, then download the grml iso to /boot/grml/ with wget:
root@debian:~# apt-get install grml-rescueboot
root@debian:~# wget http://download.grml.org/grml64-small_2014.11.iso
root@debian:~# update-grub
Generating grub configuration file ...
Found linux image: /boot/vmlinuz-3.16.0-4-amd64
Found initrd image: /boot/initrd.img-3.16.0-4-amd64
Found Grml ISO image: /boot/grml/grml64-small_2014.11.iso
done
3. Boot from GRML
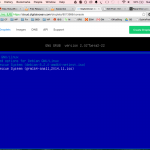
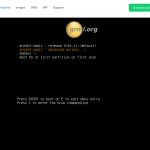
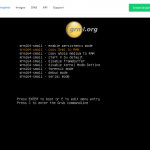
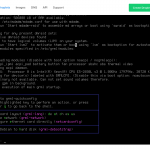
The default boot option mounts the vda device automatically, making it impossible to resize. You need to go to the advanced options and set it to run from a RAM disk instead. Here’s the steps and a few screenshots to help:
- Type reboot or shutdown -r now on the terminal window and wait for the Grub menu
- Select the Grml Rescue Image Option from the Grub menu
- Select ‘advanced options’ from the Grml boot menu
- Select ‘copy Grml to RAM’ option
- GRUB Menu
- GRML Boot Menu
- GRML Advanced Boot Options
- GRML Rescue Console
4. Repartition
- use resize2fs to shrink the existing filesystem:
root@grml ~ # fsck.ext4 -f /dev/vda1
root@grml ~ # resize2fs -M /dev/vda1
- use parted to shrink the partition and create a new LVM partition:
root@grml ~ # parted /dev/vda
(parted) resizepart 1 3G
(parted) mkpart primary 3001 100%
(parted) set 2 lvm on
(parted) quit
- Verify your work:
root@grml ~ # fdisk -l /dev/vda
- Reboot to Debian:
root@grml ~ # reboot
- Use LVM tools to create logical volumes:
root@debian:~# apt-get install lvm2
root@debian:~# pvcreate /dev/vda2
root@debian:~# vgcreate vg1 /dev/vda2
root@debian:~# lvcreate -L 5G -n home /dev/vg1
- Format and mount:
root@debian:~# mkfs.ext4 -L home /dev/vg1/home
root@debian:~# mount /dev/mapper/vg1-home /home
root@debian:~# df -h
Filesystem            Size  Used Avail Use% Mounted on
/dev/vda1             2.7G  1.5G  1.1G  58% /
udev                   10M     0   10M   0% /dev
tmpfs                  99M  4.4M   95M   5% /run
tmpfs                 248M     0  248M   0% /dev/shm
tmpfs                 5.0M     0  5.0M   0% /run/lock
tmpfs                 248M     0  248M   0% /sys/fs/cgroup
/dev/mapper/vg1-home  4.8G   10M  4.6G   1% /home
/dev/mapper/vg1-tmp   976M  1.3M  908M   1% /tmp
- Add your new volumes to /etc/fstab:
# /etc/fstab: static file system information.
#
# <file system> <mount point>   <type>  <options>       <dump>  <pass>
# / was on /dev/vda1 during installation
UUID=22f7f3aa-4357-445b-b324-9b86ee23a508 /               ext4    errors=remount-ro 0       1
/dev/mapper/vg1-home  /home  ext4   defaults,nosuid,nodev   0    2
/dev/mapper/vg1-tmp   /tmp   ext4   defaults,nosuid,nodev   0    2
5. Enjoy!
Go forth and partition your system logically according to your every whim!
Windows 7’s new “Get Windows 10” app
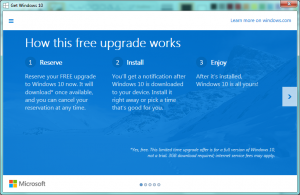
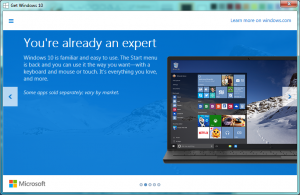
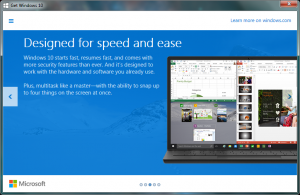
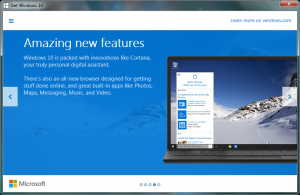
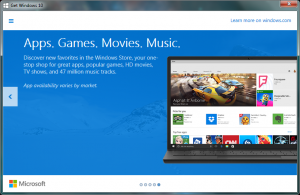
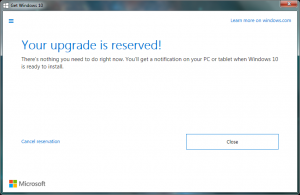
When I logged on to my Windows 7 computer this afternoon, I noticed this little gem down by my clock. It’s the new “Get Windows 10” app that must have come with the last batch of Windows updates. I created a gallery of screenshots of what to expect. All it does is reserve your upgrade, which you can cancel any time. Once Windows 10 is released, it will download it and let you install it at your leisure.
August will be an interesting month for IT people!
Lifehacker has an article on how to make Get Windows 10 icon go away if you’re either not interested or have already reserved your copy.
- Upgrade Notice Icon
- How it Works
- You’re an Expert
- Designed for Speed
- Amazing Features
- Apps, Games…
- Upgrade Confirmation
iPhone 4 GSM (A1332) Screen Replacement
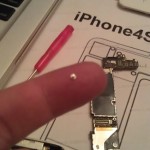
I ordered a new screen iPhone from LaptopScreen.com after my wife’s phone had an unfortunate accident. I placed the order Thursday morning and it arrived Friday afternoon. They ship from Vancouver and Seattle, so it doesn’t take long. There are detailed instructions and video tutorials on their web site, which are invaluable during the repair job. This was actually my second attempt, the first time around I pulled off a connector tab for the digitizer, so had to order a second screen. It was a learning experience.
It’s a fairly delicate procedure requiring the removal of several dozen tiny screws and connectors. To remove the front screen requires gutting logic board, camera, kick motor, and battery to get at the 10 screws that hold the front to the back.
Some tips before you begin:
- Work on a floor with a hard surface. Sweep the floor first. If you drop a screw on the carpet, you will lose it forever.
- When you snake the connectors through the frame, watch that you don’t pinch the ribbon cable between the screen and the frame.
- Use an ice cube tray to keep track of the screws as you go.
- Take your time and be patient!
Here are some photos from the disassembly:
- Before we begin. New screen (left) and broken phone (right)
- Logic board (left) and battery removed.
- All parts removed.
- The screws are super tiny.
- Broken screen beside working phone.
- Success! Its working!
Repairing your iPhone glass is possible for the determined DIY enthusiast, but requires patience and a steady hand.
Good luck with yours!
Proud to be Canadian
Canadian Actor William Shatner has a brief conversation with Canadian Astronaut Chris Hadfield over Twitter. How cool is that?
@WilliamShatner Yes, Standard Orbit, Captain. And we're detecting signs of life on the surface.
— Chris Hadfield (@Cmdr_Hadfield) January 3, 2013
Review of Linux Malware Detect
Linux Malware Detect is an open source malware scanner designed to detect threats found in a shared web hosting environment. It’s signature based, sharing the same virus definition format as ClamAV. It will actually use clamscan, if available, as the scanning engine for increased performance. It can also clean up infected HTML or PHP files in some cases. I’ve installed it on both a Debian Lenny server and a CentOS 5.7 system, with no difficulty.
Installation
Installing Linux Malware Detect:
$ cd /usr/src
$ wget http://www.rfxn.com/downloads/maldetect-current.tar.gz
$ tar zxvf maldetect-current.tar.gz
$ cd maldetect-1.4.1
$ sudo ./install.sh
First Scan
By default, maldet installs a cron job to /etc/cron.daily/. This cron job will scan common web site directories each day for files created in the last 2 days. It looks for the presence of installed hosting control panels and scans accordingly. Review this file and ensure it will work in your environment. It can also be set up to scan new files on demand through either inotify or modsecurity for Apache.
Since it only scans the most recent files, its a good idea to do a full scan by hand:
$ sudo /usr/local/maldetect/maldet -b -a /var/www/vhosts/
To follow the progress, watch the scan log like this:
$ sudo tail -f /usr/local/maldetect/event_log
Jul 19 10:38:38 www4 maldet(19848): {scan} launching scan of /var/www/vhosts/ to background, see /usr/local/maldetect/event_log for progress
Jul 19 10:38:39 www4 maldet(19848): {scan} signatures loaded: 9649 (7782 MD5 / 1867 HEX)
Jul 19 10:38:39 www4 maldet(19848): {scan} building file list for /var/www/vhosts/, this might take awhile...
Jul 19 10:39:07 www4 maldet(19848): {scan} file list completed, found 56291 files...
Jul 19 10:39:07 www4 maldet(19848): {scan} found ClamAV clamscan binary, using as scanner engine...
Jul 19 10:39:07 www4 maldet(19848): {scan} scan of /var/www/vhosts/ (56291 files) in progress...
Jul 19 10:39:32 www4 maldet(19848): {scan} scan completed on /var/www/vhosts/: files 56291, malware hits 0, cleaned hits 0
Jul 19 10:39:32 www4 maldet(19848): {scan} scan report saved, to view run: maldet --report 071912-1038.19848
Wrapping Up
Linux Malware Detect does what it says on the tin. It’s a valuable addition to a sysadmin’s toolbox if you’ve got any public facing linux web servers.
Freakonomics on Music and Video Piracy
The main point is that most statistics on jobs or dollars lost to piracy are completely made up:
I still think media companies should instead focus on making it easy and cheap to get the media people want onto the devices people use. Apple’s iTunes comes close, but it’s still hard to use if your music player doesn’t support Apple’s proprietary music format. By hard, I mean that I can do it, but I have to change the default settings and provide instruction on how to make it all work for my wife and kids for each individual player.
Making it Easier & Prevent Piracy Too
I’ve always maintained that the solution to combating Internet Piracy is to make it easy and cheap for consumers to get what they want. Comedian Louis CK did exactly that and put up a site to sell a video of his “Live at Beacon Hill Theatre” for only $5. So far he’s sold 110, 000 copies.
I think the other thing that makes this work is that he’s selling it personally. I think people feel less guilty about ripping off a corporate giant like Sony than someone with a face.
Pin Number Frequency
I frequently pay at the pump at the local gas station. The other day I noticed that the wear pattern on the pump’s PIN pad shows distinct wear on the 0 and Enter keys (see photo). My guess is that people are frequently choosing 0000 as their PIN number. Hopefully, I’m wrong.
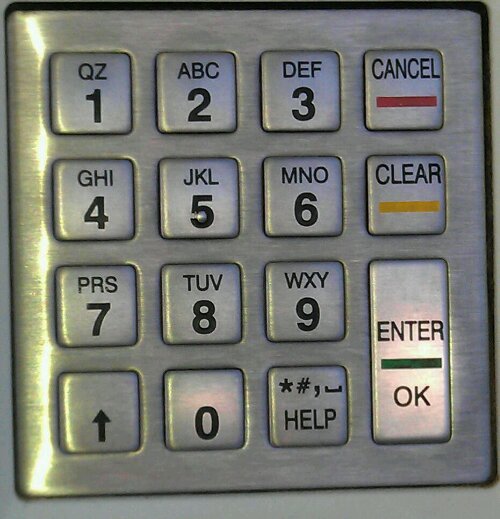
Is 0000 the most common pin number?
